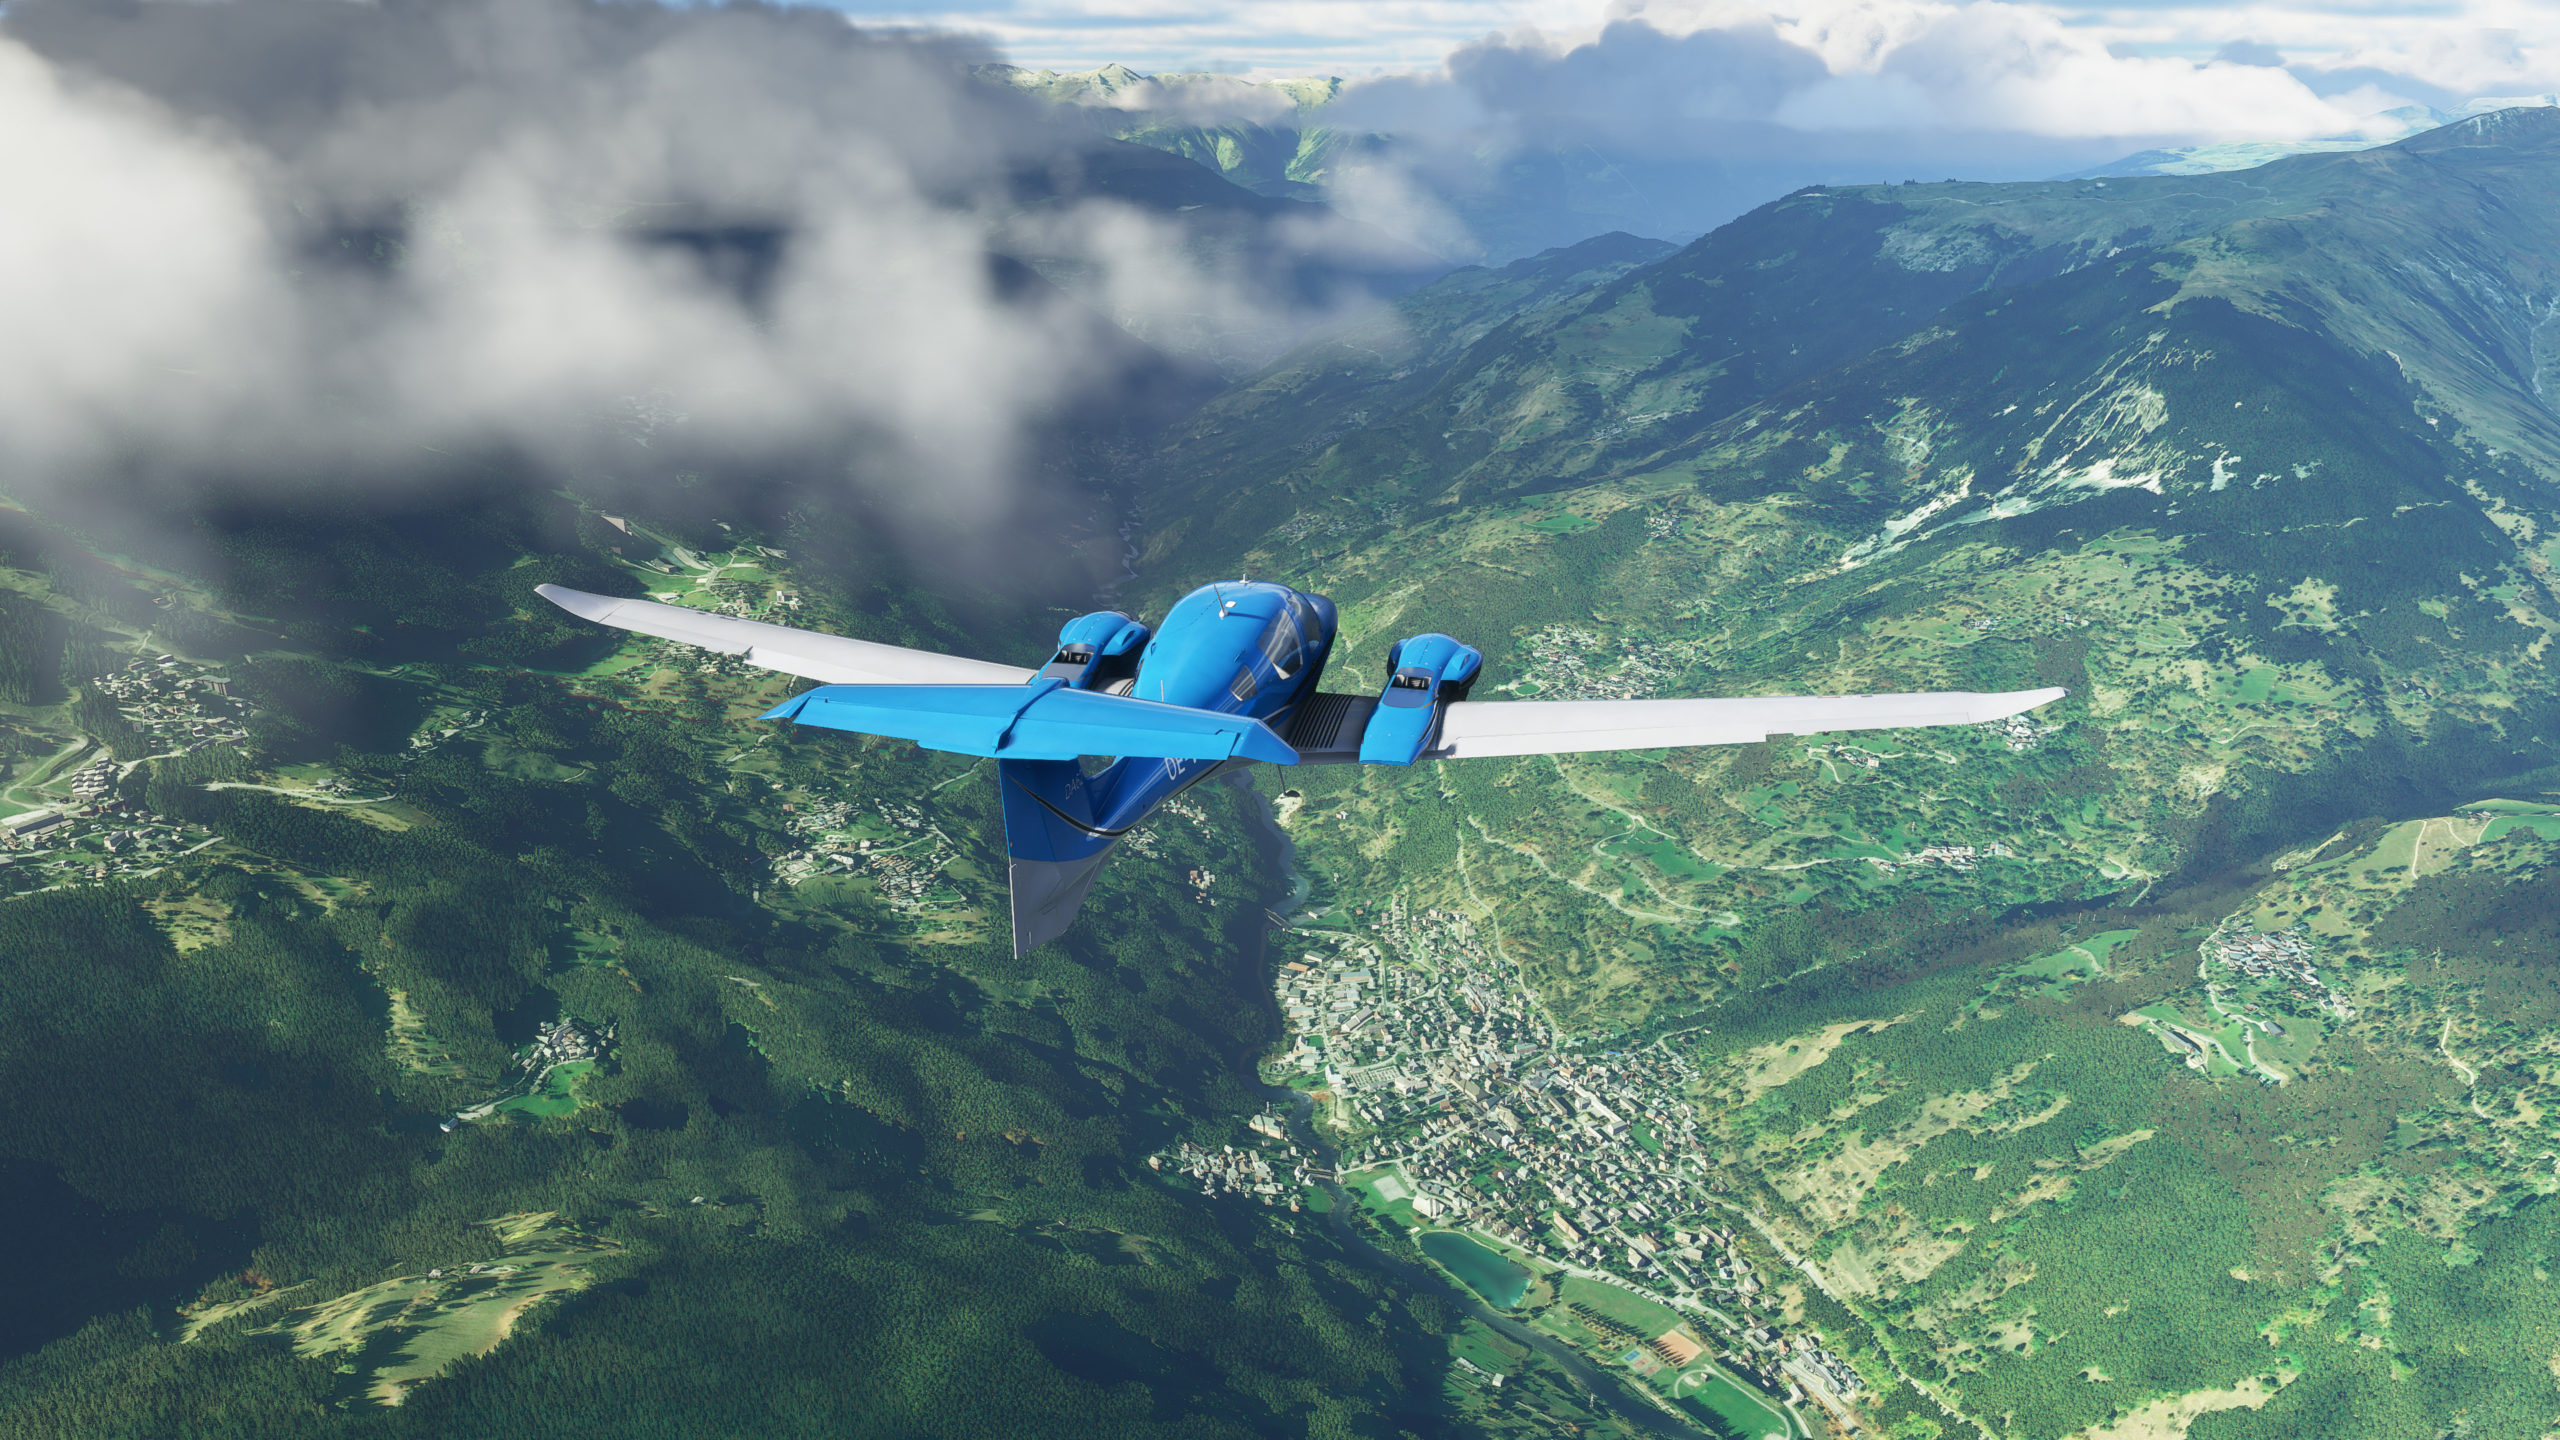
Tobii Eye Tracker vs VR
I love virtual reality. I even incorporated it into my online identity (look, it’s right there, up in the top-left corner). Sometimes though, I can’t or just don’t feel like wearing a head-mounted display while playing simulation games.
While there is currently no substitute for the level of immersion and the sense of presence one may get from VR, there are also quite a few cons, making playing on the monitor a better choice.
Readability
High-end headsets like Valve Index provide resolutions high enough to make out any detail on the screen. Step down to Vive or Rift, and small text begins to become an issue.
While most of the VR-first titles adjust their UI to optimize for readability, others – especially those that can also be enjoyed on a flat screen – often make it quite difficult to decipher details such as button labels, mission briefings, map markers, etc.
Regardless of the resolution, for the time-being, it is significantly easier to read any text from a computer monitor, rather than an HMD display.
Performance
It takes significant horsepower to drive a VR experience. You have two viewports to render and higher framerates to maintain for comfortable experience. Valve and HTC recommend 90fps as a minimum baseline – and I tend to agree. Oculus goes with much more modest 75fps.
Whichever option you go for, the numbers are much higher than the 60fps commonly considered a good standard on PC, or even 30fps usually seen on consoles, or games claiming “cinematic approach”.
With variable refresh rate monitors (FreeSync and G-Sync), you can even get away with unstable framerates and still have a good experience.
Cost
I think this goes without saying. It’s approximately $100 for last gen TrackIR. Even less for a knock-off / compatible products. Latest Tobii Eye Tracker will run you for around $200, but then some laptops have it already integrated.
It may not be nothing, but it’s peanuts to how much a decent VR setup will cost.
Compatibility
Head trackers work on many more titles compared to VR headsets. Most offer some level official support – others can be patched or hacked in with minimal effort.
When it comes to Microsoft Flight Simulator 2020 the answer is a combination of above factors.
First, while the developer promises VR support to be implemented in a later update, we do not know how robust it will be and what devices it will support. More important – it is not here now. Some people had some success emulating VR using vorpX, but it should definitely be considered a limited hack, and not a full conversion at this point.
Second comes the matter of performance. While I remain hopeful for the sim to be optimized in upcoming weeks and months, at the moment it really struggles to deliver steady framerates at higher resolutions. Running it at 90fps in VR is likely impossible without significantly lowering the visual quality.
Third: the matter of controls. I play using a DualShock 4 controller and do not own flight simulator peripherals (joystick or a yoke, pedals, throttle). With limited number of functions available to map onto a controller, I need to have easy access to both the mouse and the keyboard. Fumbling around for them with an HMD on my face and looking for the right key does not sound feasible.
Finally is the matter of awareness. My typical flight session lasts around 40 minutes. I like to be able to look away from time to time. Perhaps change the track on my music player. Maybe have a chat with my wife. Playing on the monitor makes it much more convenient to hop in and out of the game, taking full advantage of MSF2020’s active pause function.
Tobii vs TrackIR
TrackIR is likely the most widely used head tracking system throughout the simulation enthusiast community. It’s quick and easy to set up and simple to use. Best of all – you can either purchase a ready-to-play kit, or use your existing webcam with either an original tracking clip, a multitude of off-brand compatible ones – or even 3D print your own.
The system uses a clip with three infrared LEDs (or passive reflectors) that needs to be attached either to a baseball cap, or headphones. It then tracks the position of the lights using a camera, translating the rotation and translation (position) of its user’s head. For the most part the tracking is rock-solid, although you can run into problems if you turn your face so that your head obscures the clip from camera’s view.
TrackIR was my first entry to head tracking, and had me switch from playing Elite Dangerous on my Vive, to a 1440p monitor. After a while though, I grew weary of having to always attach the clip to the headphones – and of the fact I had to wear them at all. I needed something simpler.
Tobii Eye Tracker is a thin bar, reminiscent of Nintendo Wii tracking bar, or Microsoft Kinect after a massive diet. Mounted under or over your monitor, it uses a combination of a camera and an array of infrared lights to track your head rotation and translation, as well as your gaze. After a bit of training, it is able to track your eyes and what you’re looking at in real time. (It’s really awesome for spotting and marking enemies in many games).
Tobii does not require you to wear anything, tracking your face directly. It rarely, if ever, loses the track and works well in all light conditions.
I think we have a winner.
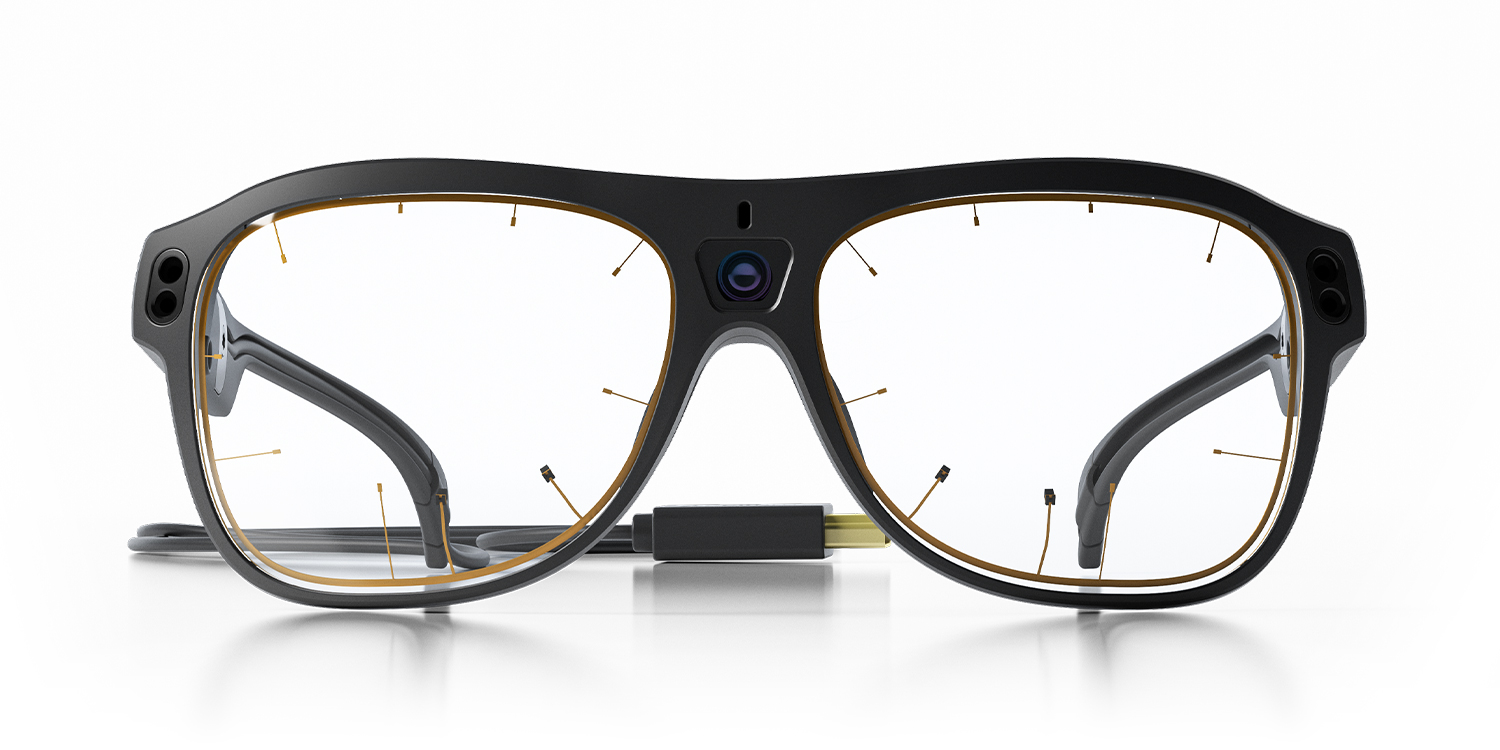

Tobii vs Microsoft Flight Simulator 2020
It is my understanding that gaming is a relatively recent avenue for Tobii. When I first encountered them at a Game Developers Conference several years ago, their primary focus was on assistive technologies and eye-tracking analytics. With all the great work they do to help people with disabilities, its hard to complain that their gaming software does not get enough attention… but it doesn’t.
Game developer may choose to implement Tobii support directly. As a user, all you need to do then is plug your device, make sure the driver is running, and you are ready to play. That is the case with games like Euro Truck Simulator 2, or a multitude of Ubisoft titles.
Asobo Studio, the developer of Microsoft Flight Simulator 2020 decided not to implement support for this device at launch, and has not announced any future intent as of yet.
For the games that don’t offer native support (like aforementioned Elite Dangerous) users can download Tobii Game Hub – an add-on software that enables eye and head tracking in many titles. The most recent update to the Game Hub is now five months old, and even then it was just a maintenance release with no new games added. The best I can tell, the list of supported games was last updated in version 1.6 released in December 2018? (At least that’s the date on the oldest download mirror I could find.)
Unsurprisingly, Tobii themselves, did not implement support for Microsoft Flight Simulator 2020, either.
Upon launch with Tobii bar active, the game sees that something is out there, but misidentifies the device as TrackIR, and is unable to communicate with it.
Game Over? I don’t think so.
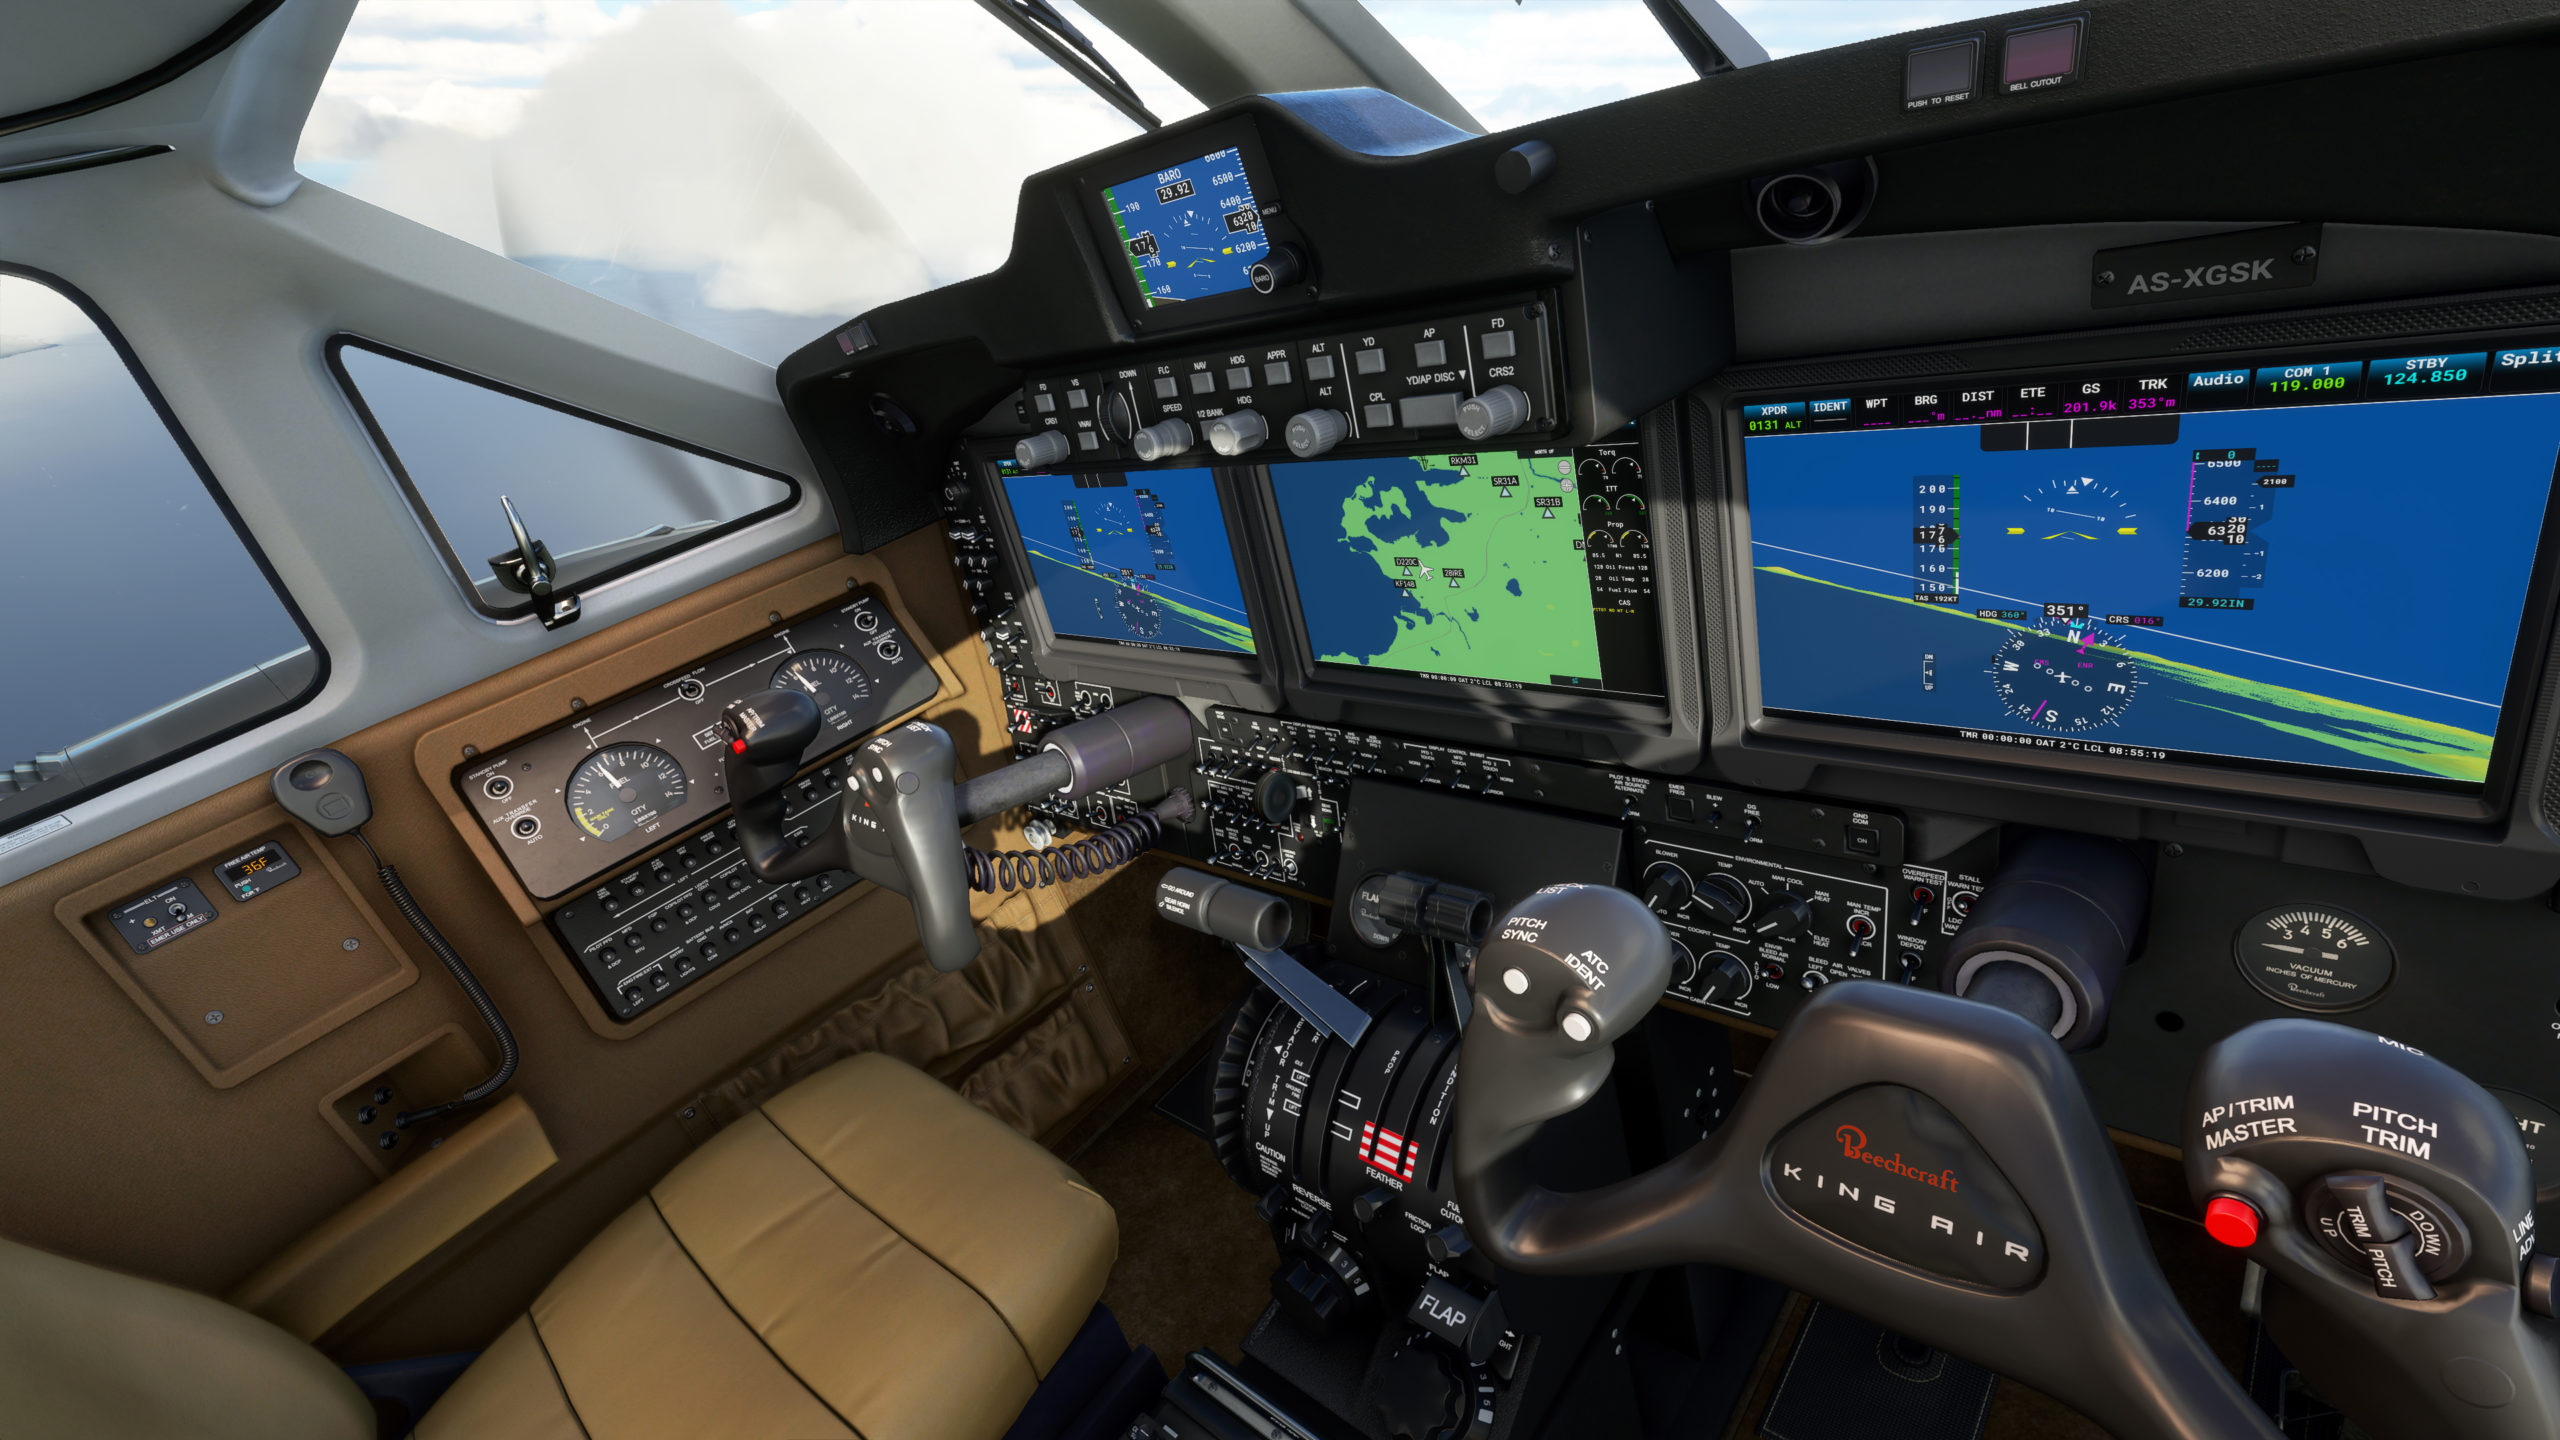

QubaXR × Tobii
While the solution outlined below is a bit of a hack, it should allow you to play Microsoft Flight Simulator 2020 (MFS2020) with full head tracking via Tobii Eye Tracker. I suspect the same method will work for a multitude of other games which are currently not compatible with Tobii but support TrackIR or FreeTrack protocols.
I am going to assume that by the time you begin following the steps below, you have already installed MFS2020 and have your Tobii up and running. You will also need either a PayPal account or a Credit Card for a one-time micro-transaction of €3.45 (approx. $4.00) as one of the required pieces of software is no longer completely free.
I have only tested this method with Tobii Eye Tracker 4C which is the model I own, and with the Steam version of MSF2020. I cannot confirm whether it will work with Tobii Eye Tracker 5.
Finally, this method uses FaceTrackNoIR. A free alternative of OpenTrack exists, but as of August 2020 it does not yet support Tobii input. It is currently planned to be included in a beta form on OpenTrack’s next (2.4) release sometime in the future.
So here’s what you’ll need to do:
- Go to the official website of FaceTrackNoIR project and purchase, then download the app. It costs next to nothing, and you will be supporting future development of the project.
I am using version 201 in this guide. Newer one may have been released since. - While on the website, grab the (free) Plugin-Pack for FaceTrackNoIR.
- To be on the safe side, you may also want to get the Tobii4C Headtracker Plugin. It should be included in the Plugin-Pack above, but in case it is not, that’s your backup.
All plugins are free, and can be found either linked from the main page of the project, or in the site’s Downloads section. - Install FaceTrackNoIR, followed by the Plugin-Pack.
- Make sure your Tobii Eyetracking driver is running and set to ON, then launch FaceTrackNoIR.
The app should look a little something like this:
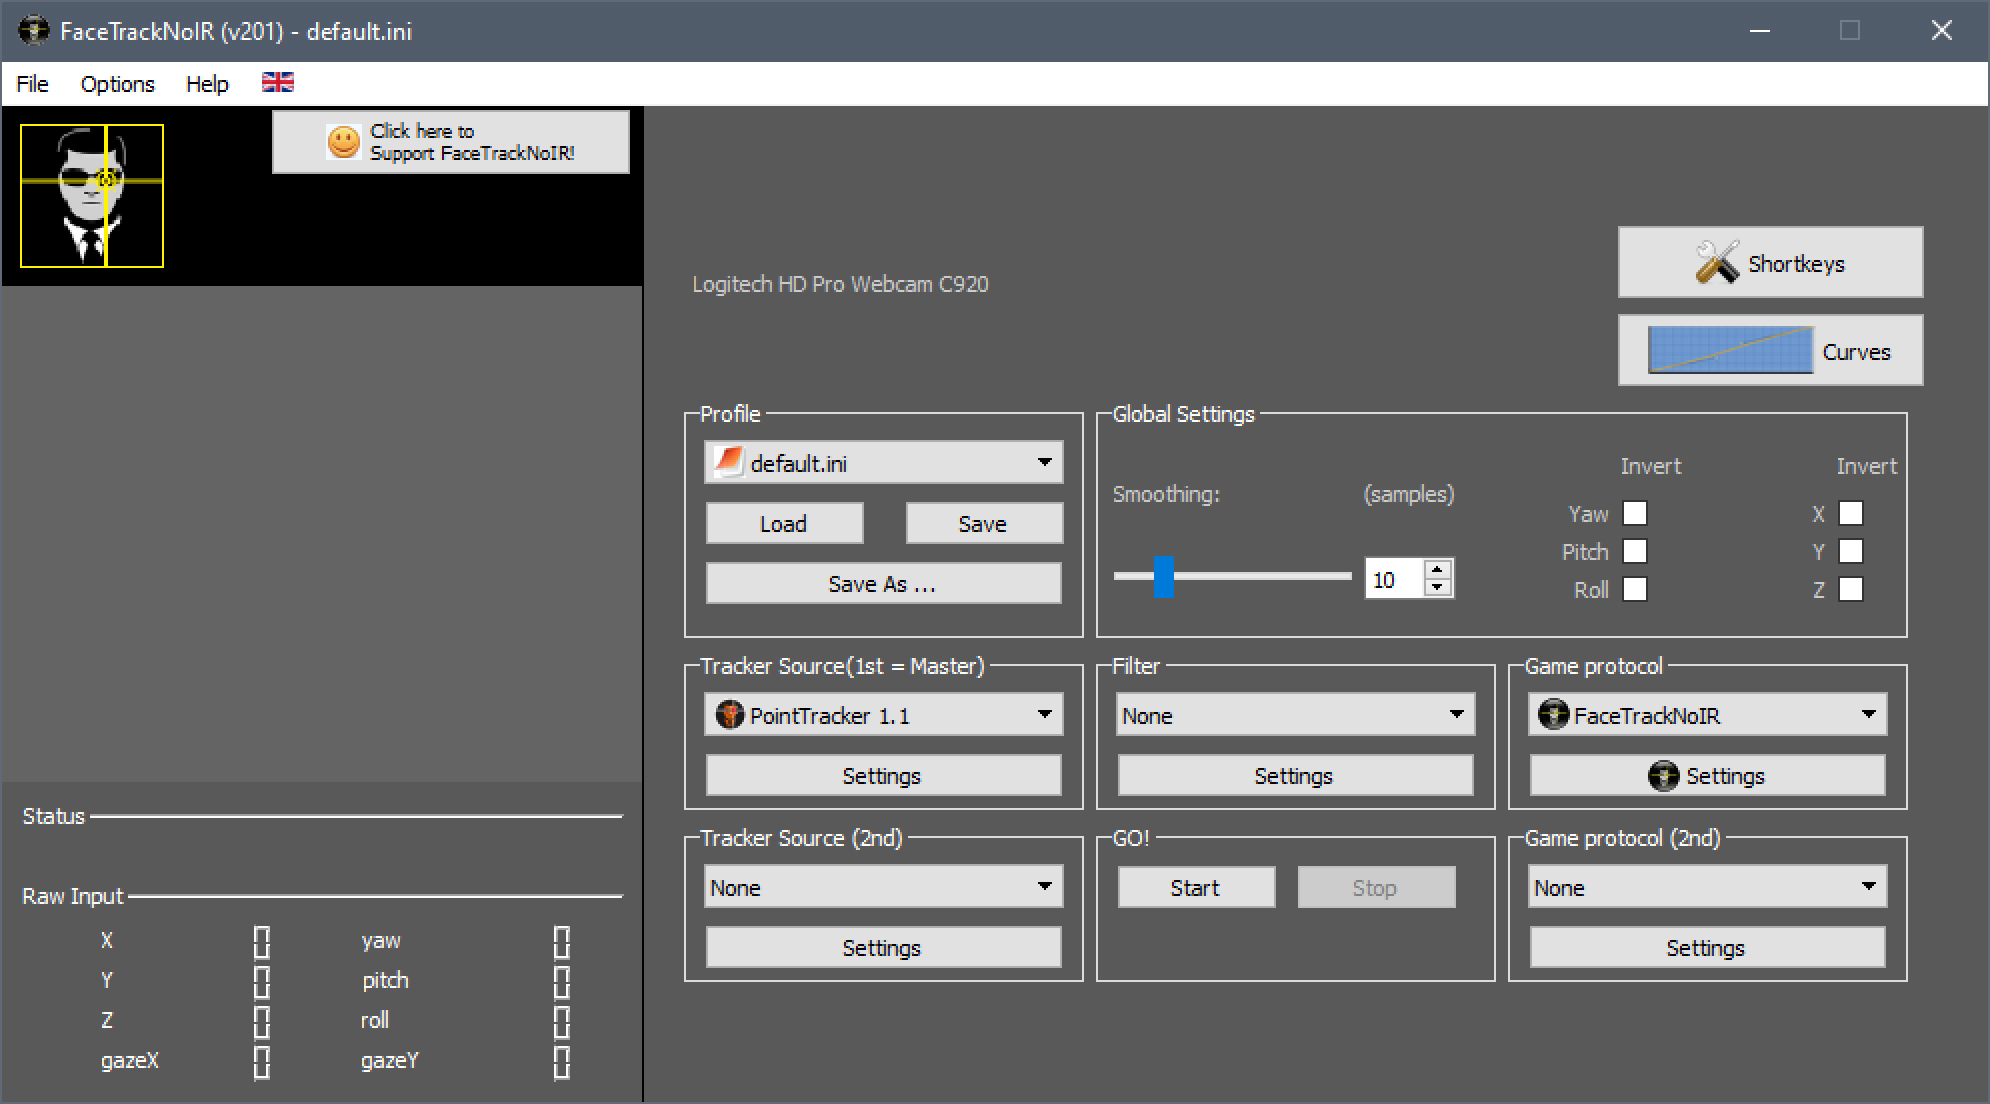

- Under Tracker Source (1st = Master) select Tobii4C Head&Eye Tracker. Don’t worry about the settings for now.
If the option is not available, exit the app and install the Tobii Plugin from the separate (third) installer you downloaded, then try again. - Under Filter select Accela Filter Mk2
If you know what you are doing, you’re free to use another filter here. I’m running Accela on default settings. - Under Game Protocol select Free Track 2.1. Again, we’ll deal with the settings in a moment.
- Leave Tracker Source (2nd) and Game Protocol (2nd) empty – set to None.
- Under Profile, click Save As … button and name your new profile. I’m naming mine MFS2020.ini
Now, I don’t know it this is a common issue, but on my system FaceTrackNoIR tends to frequently crash when I stop the tracker. It could be the app, one of the plugins, or simply my system. In case this happens to you, I recommend to frequently save your profile, before testing any changes you make. - OK, enough waiting. Under the GO! section, press the Start button.
Your program should come alive with a whole bunch of numbers rapidly changing on the screen, looking like the screenshot below:
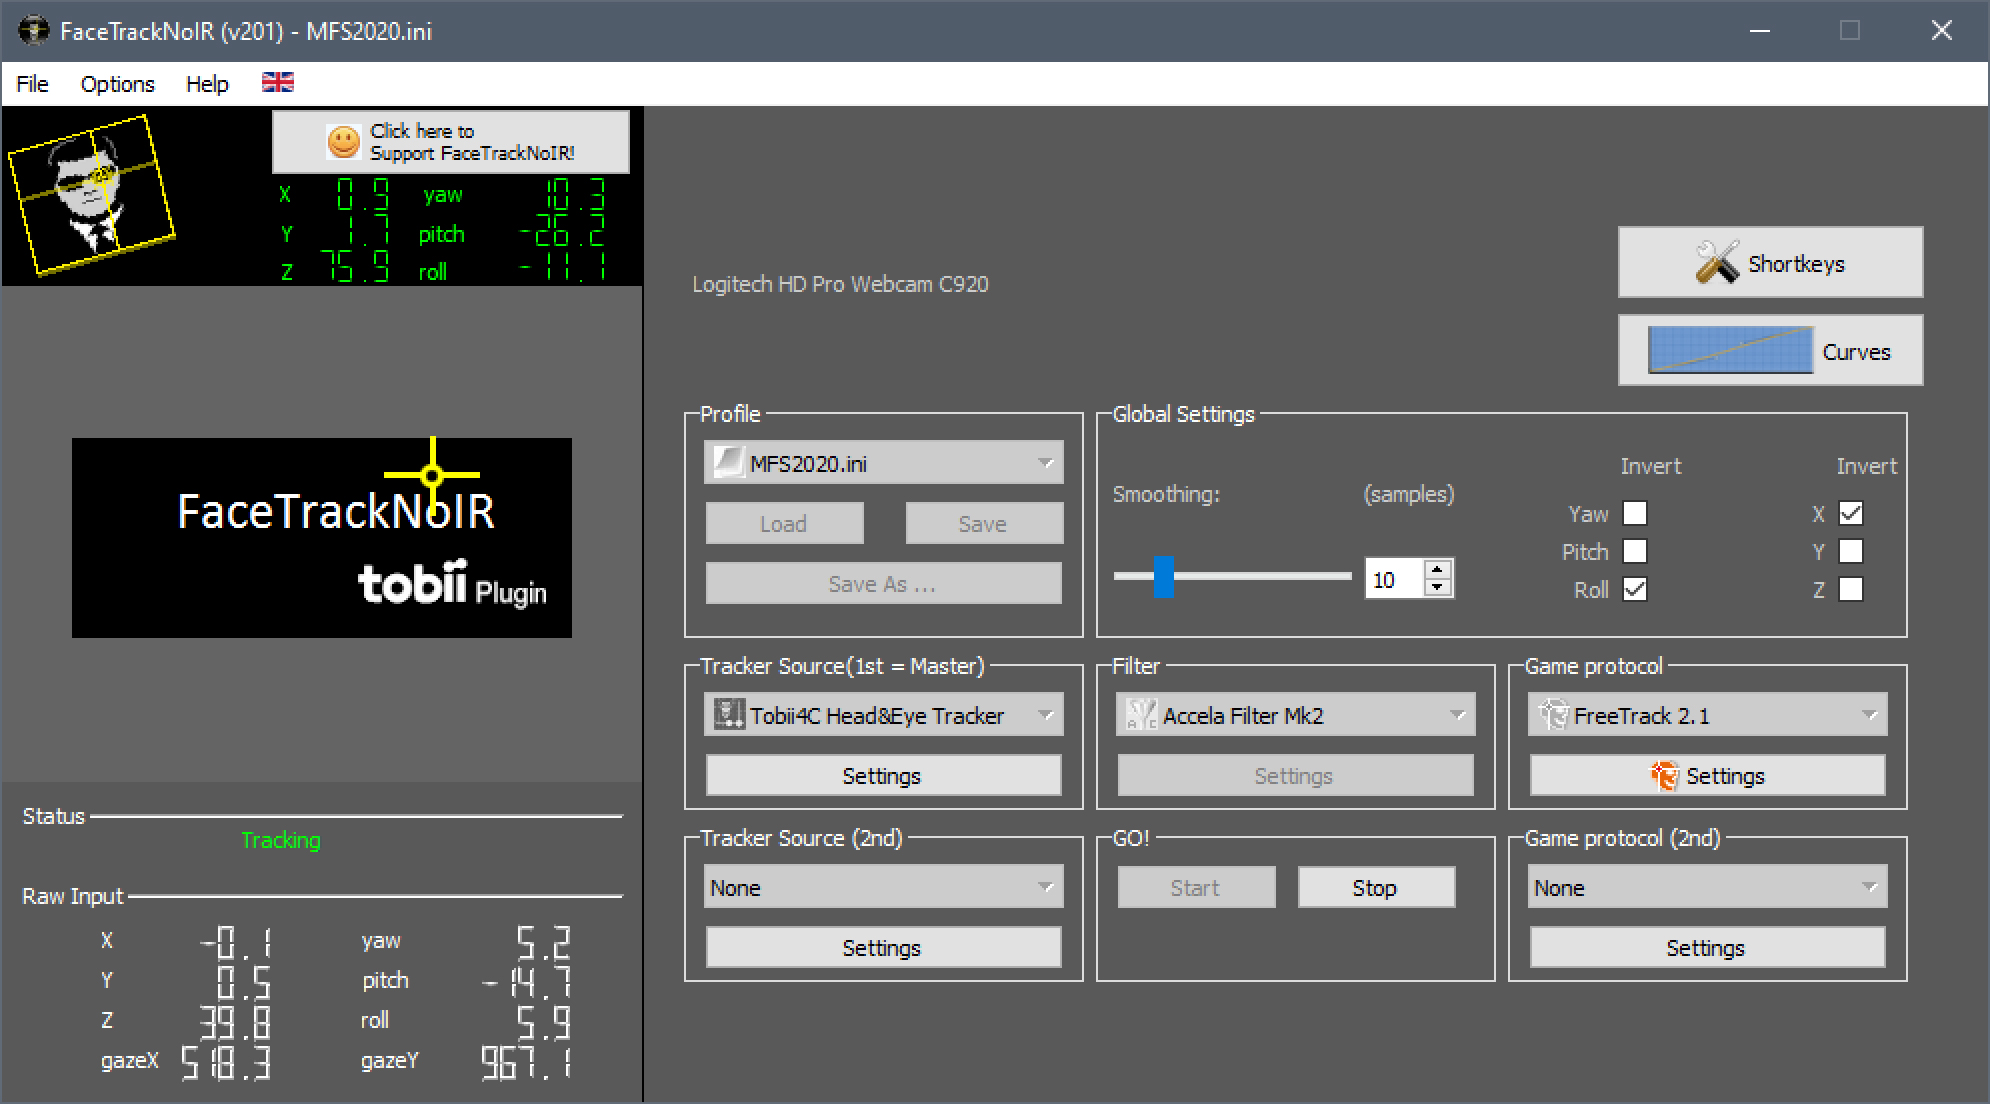

- If for some reason the tracking fails to initialize:
- Retrace your steps through this guide
- Consult the FaceTrackNoIR Wiki
- Check the official forums
You may try posting in the comments below, but I doubt I will get the chance to troubleshoot you, and I definitely guarantee I won’t answer any emails asking for tech support in this matter.
- Fingers crossed though, everything went smooth and you are ready to start dialing in the settings.
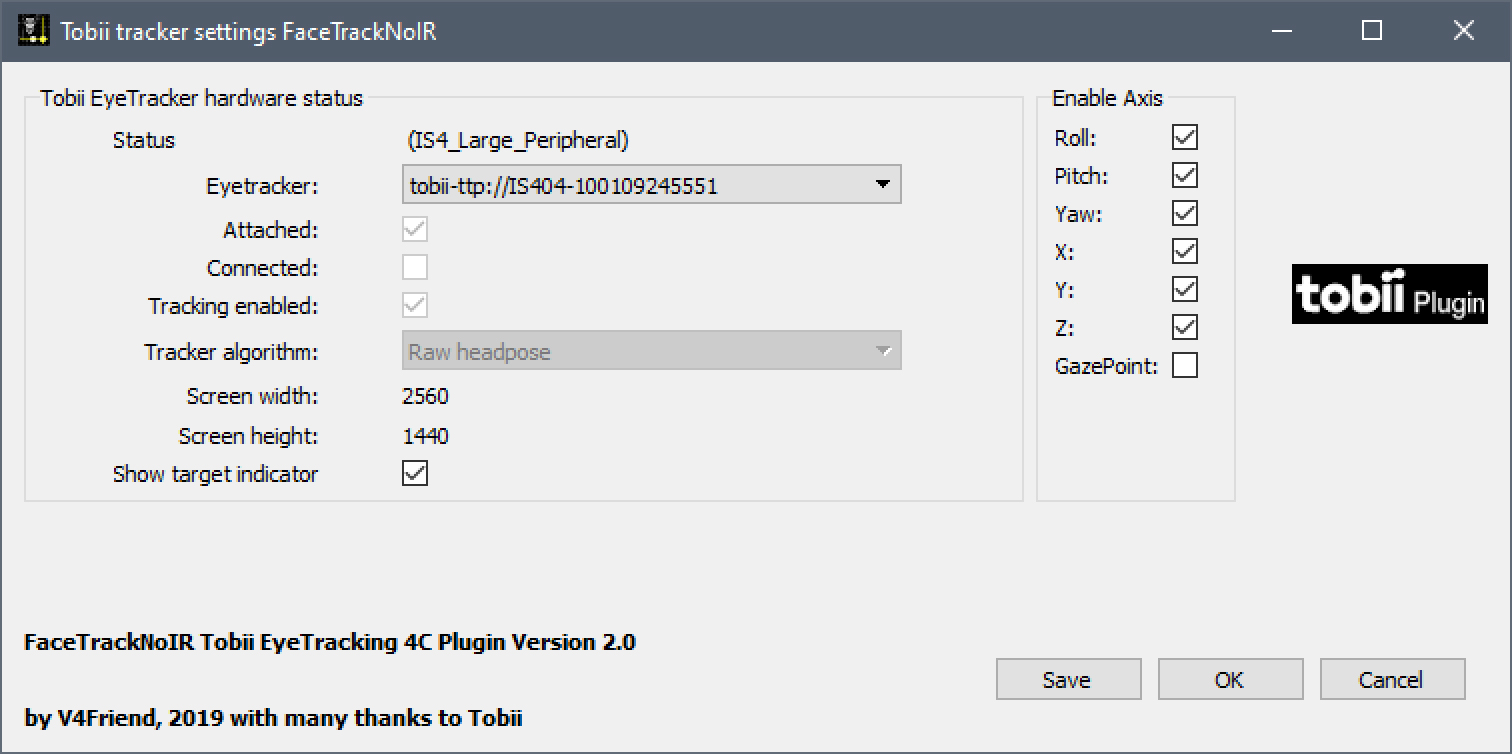
Hit Stop button under GO! section to stop tracking. If the app crashes like it does for me, simply re-open it, and pick your profile from the list. - Let’s configure the Tracker Source first. Underneath the Tobii4C Head&Eye Tracker, hit the Settings button.
In the window that pops up, under Enable Axis, turn GazePoint OFF. MSF2020 will only accept the head pose data, so no need to waste processing cycles on tracking the eyes.
Depending on your preference, you may also want to turn off Roll later, but for now let’s keep everything we can running.
With some details like screen resolution varying from system to system, your config should look like the screenshot below.
Click Save, then click OK.

- Now let’s set up the Game protocol – details on how the app will pass the data to MSF2020.
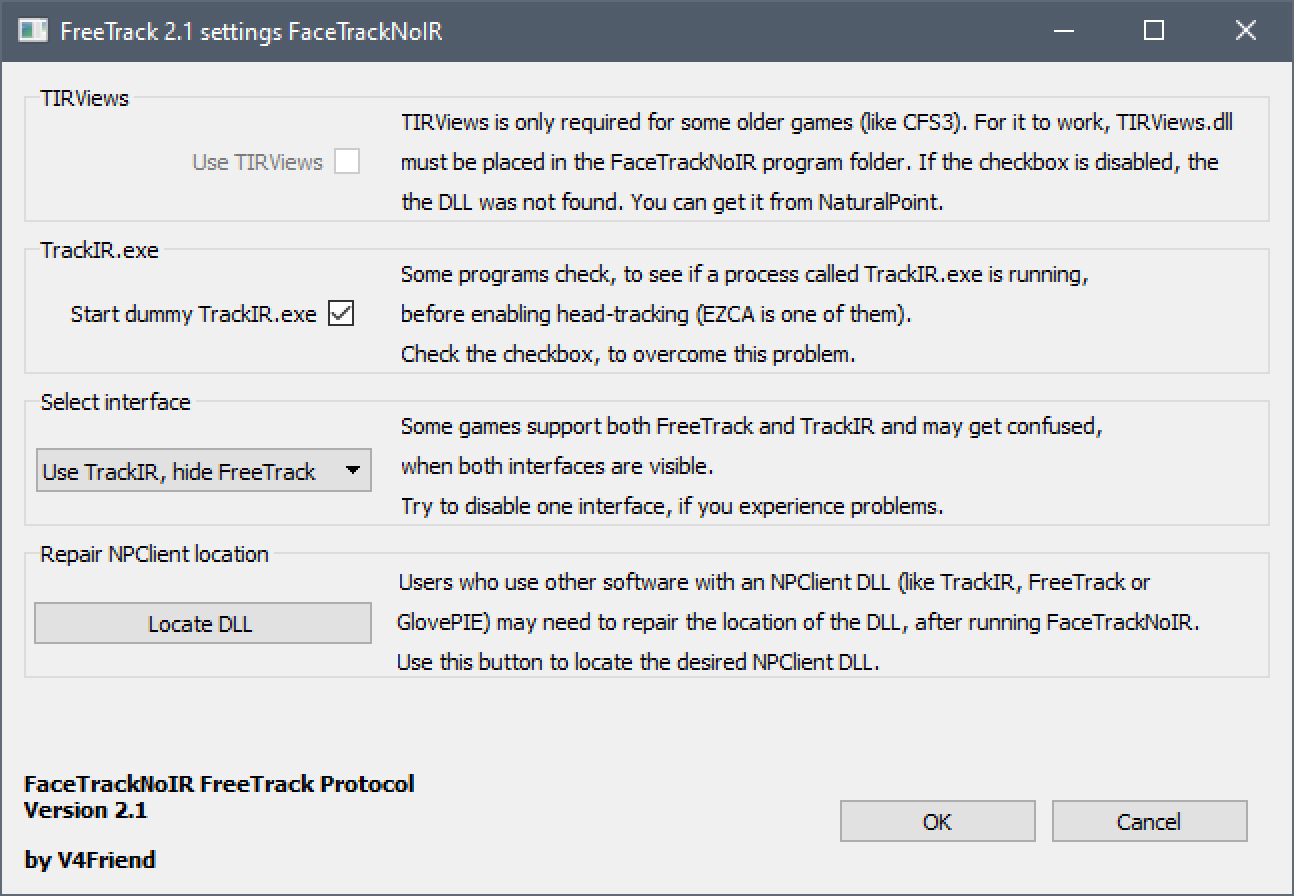
Click on Settings underneath FreeTrack 2.1.
Set Start dummy TrackIR.exe to ON
Under Select interface, pick Use TrackIR, hide FreeTrack. No need to confuse MSF2020 too much. It’s already stretched thin.
Confirm your settings look like the screenshot below, then click OK.

- Probably a good time to save your profile now.
- Click the big Curves button in the top-right corner.
At the moment even a tiny movement of your head will translate to huge swings of the camera. We’ll want to limit that somewhat.
Use your mouse to edit the graphs. Left button will add new points on a curve, right button will remove them.
Try to mimic the graphs from the screenshot below, limiting the Yaw, Pitch Up and YawLeft to around 90°, while keeping Roll and Pitch Down at 50°
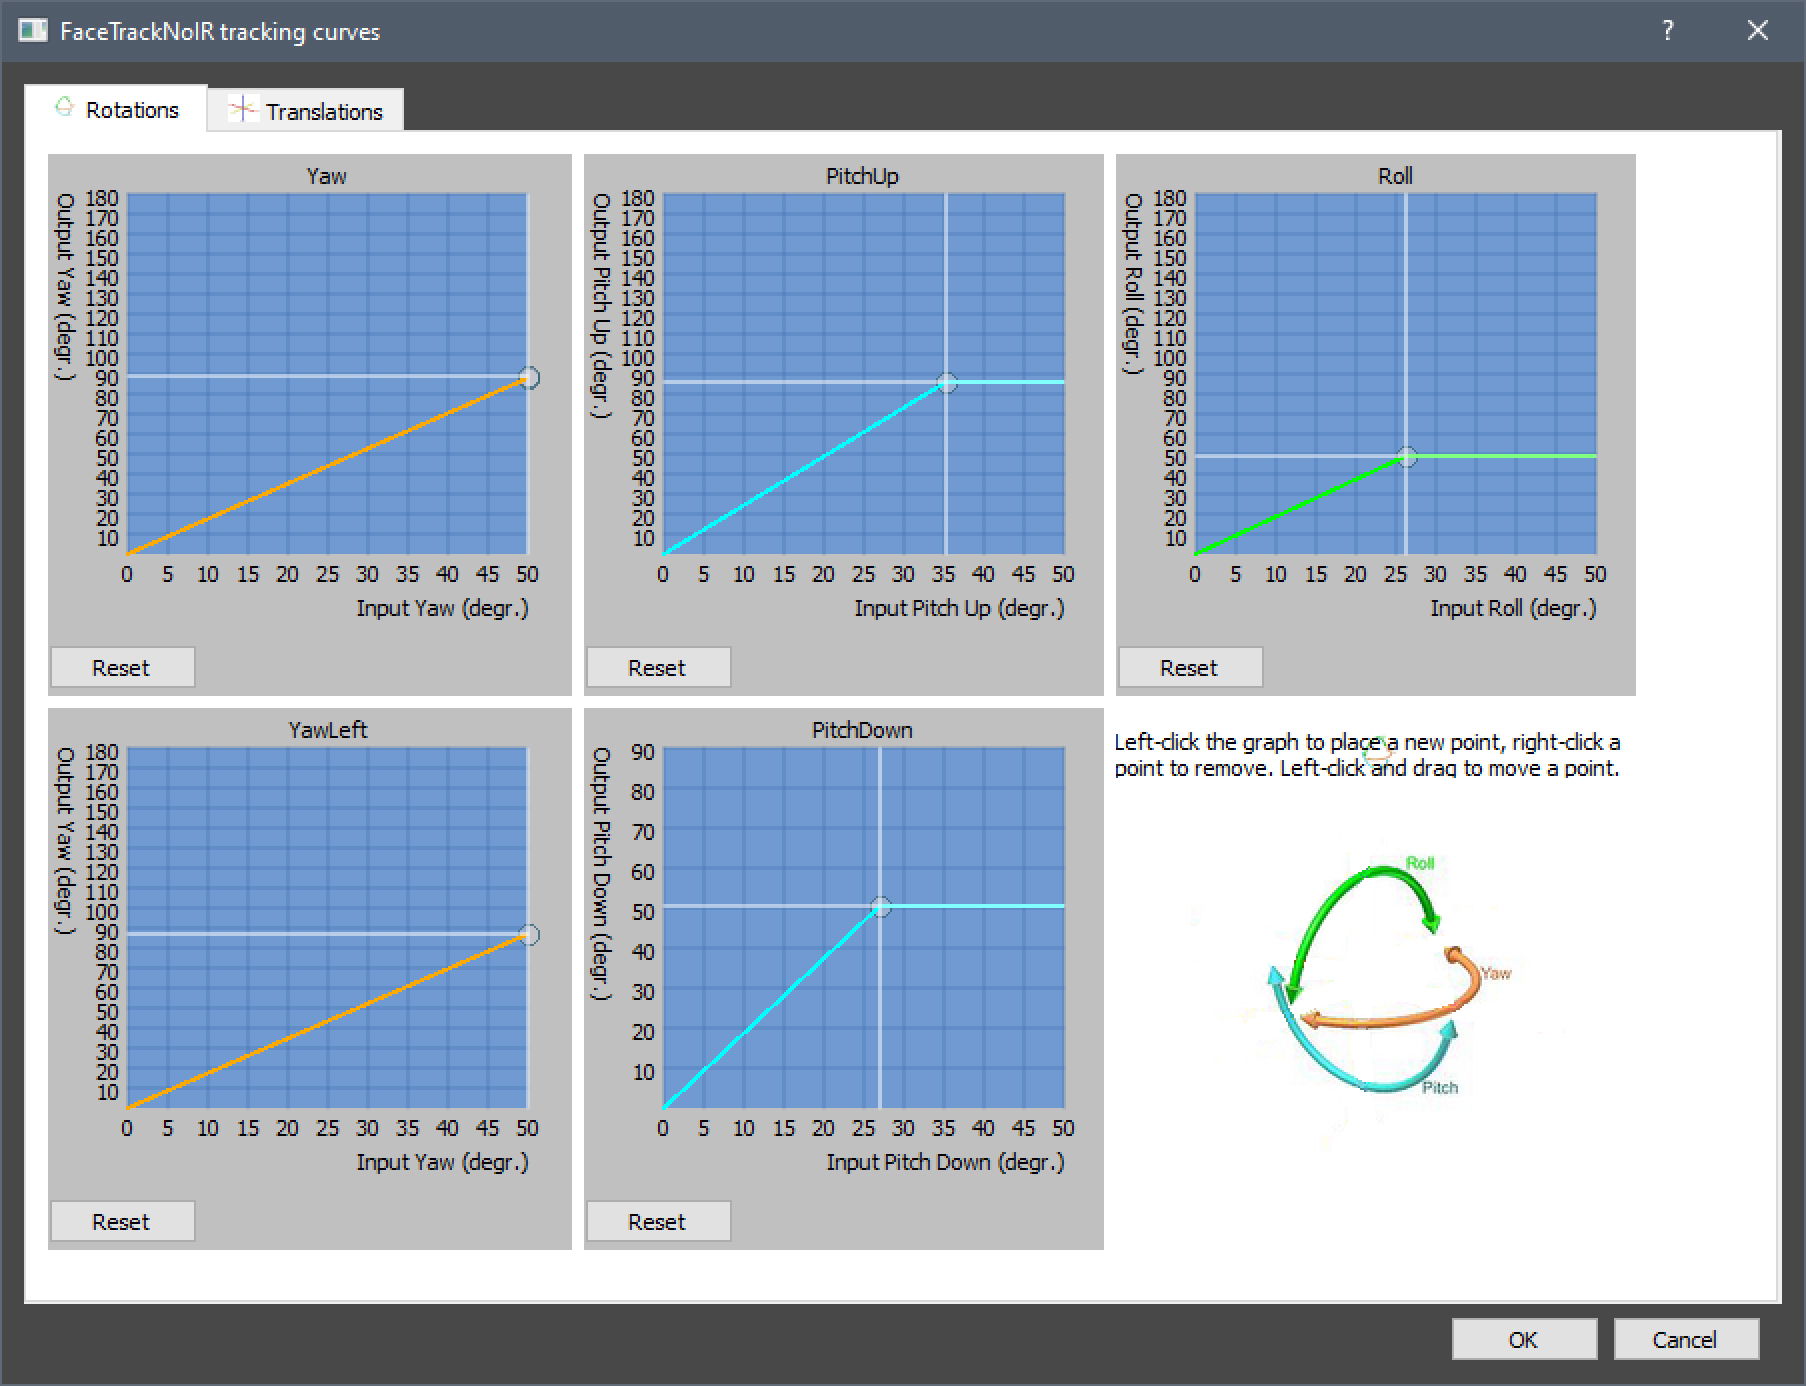

- Once you are more accustomed to head tracking you may want to flatten (ease out) the beginnings of the curves, but only try that after you’ve successfully played with tracking enabled for a while.
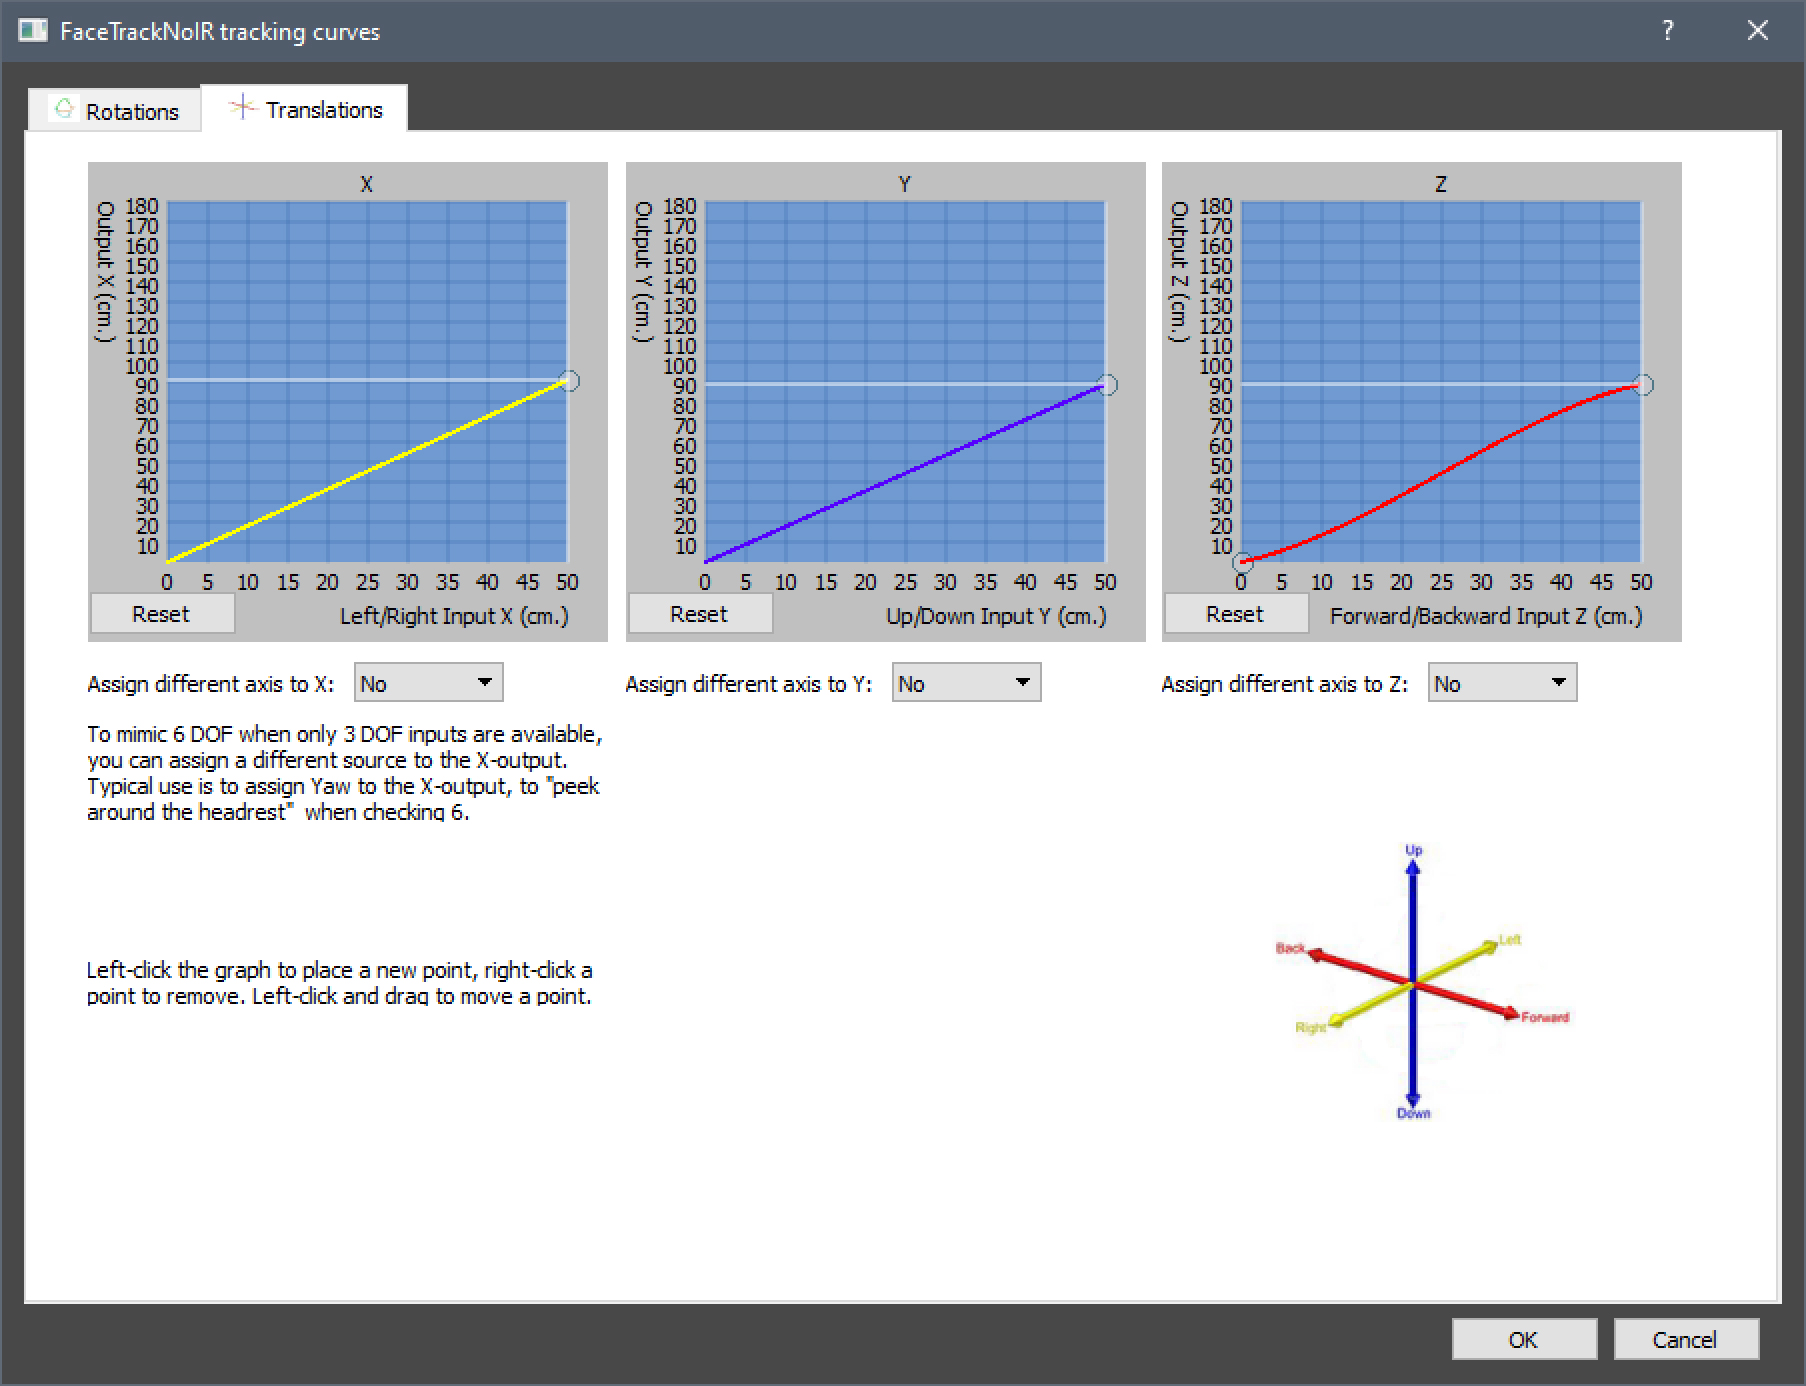
For now, switch to the Translations tab and aim to match your curves to the image below.
I can’t recall now, whether I adjusted these or left them at default – but if you find that your forward-backward motion is too rapid, flatten the Z curve further. After all, you can expect to be using it a lot to get a closer look at the instruments.

- Click OK to close the Curve Settings
You’re in the home stretch now. - In the main window, under Global Settings tick ON the boxes for Invert Roll and Invert X
Finally, adjust the Smoothing slider. I found the value of 10 to work for me. - Now, while it is fun to look around while in the cockpit, it may be counter-intuitive when using outside camera or the drone cam. Let’s set some shortcut to toggle the tracking on/off.
Click on the Shortkeys button in the top-right corner of the main window.
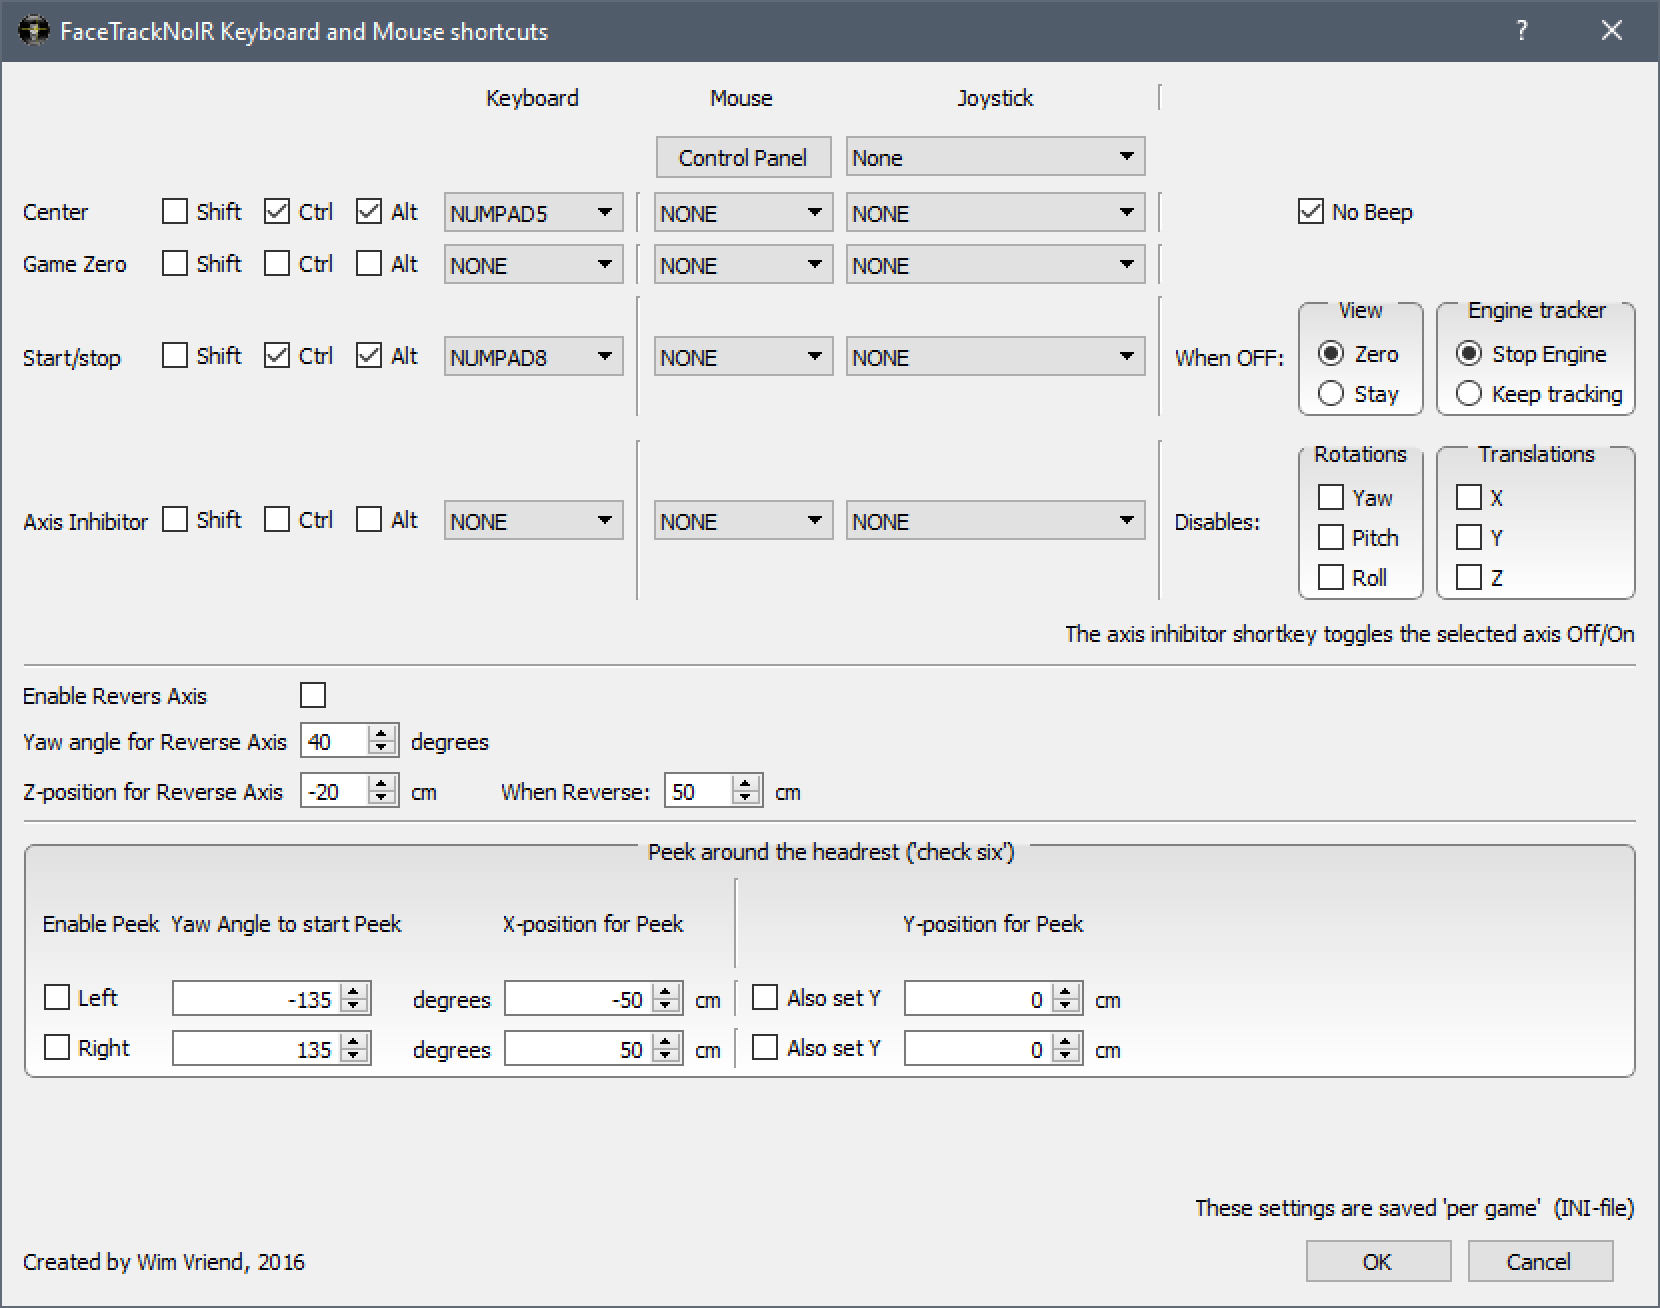
There are two functions you really want to bind here: Center – to reset your idle, default head pose, and Start/stop to toggle the tracking. I’ve set mine to Ctrl+Alt+NUM5 and Ctrl+Alt+NUM8 respectively.
Also, toggle No Beep to ON, if you don’t want Windows chime each time you hit a shortcut.
When OFF: View to Zero and Engine tracker to Stop Engine

- And that’s it – you’re all set.
Save your profile one last time for good measure.
Correct Launch Sequence
When you are ready to fly, follow these steps:
- Make sure Tobii Eyetracking driver is running and set to ON
- Launch FaceTrackNoIR and hit Start under GO! tab.
- Launch Microsoft Flight Simulator 2020 and start your desired activity
- Once you are loaded into the cockpit, sit comfortably and Center your camera (Ctrl+Alt+NUM5 on my settings)
- To temporarily disable/enable tracking, use your Start/Stop shortcut (Ctrl+Alt+NUM8 on my settings)
- Don’t forget to wave and/or barrel roll to me when flying over Seattle.
Godspeed, everyone! o7
